Contact Me

Contact Me
Contact Me

Working Mom Blogger

Working Mom Blogger
Working Mom Blogger

Health & Wellness

Health & Wellness
Health & Wellness


Pea & Cilantro Soup (Diana Henry)


Pea & Cilantro Soup (Diana Henry)

Pea and cilantro. I'm surprised to find that this combination actually tastes very good! I always have frozen peas in my freezer. They come in handy when I want to add something green in my dishes or when I cook my baby's meals.


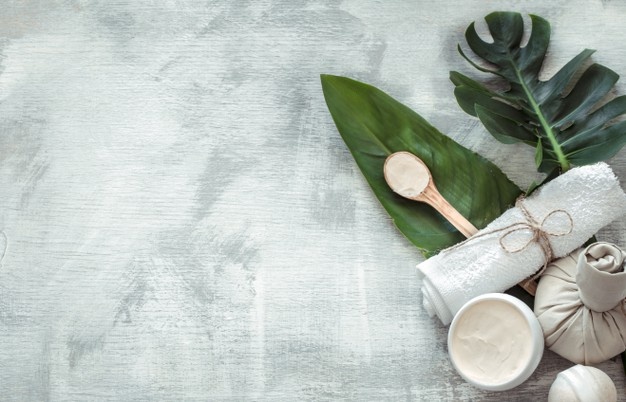
This week, IHCC's theme is Veggie Variations! I choose Diana Henry's Pea & Cilantro Soup.


Recipe adapted from here.

Ingredients: 
(Serves 2) 

Note: I've scaled down the recipe.
 
2 tablespoons olive oil
1/2 large yellow onion, coarsely chopped
1 small potato, chopped
1/2 teaspoon ground cumin
1 large bunch of cilantro
1 cup frozen peas, thawed
2 cups low-sodium chicken stock
Pepper to taste
Light cream, for garnishing


How to:

1. Heat up oil in a deep pan. Add onion and potato and stir. Add cumin and stir for a minute to release the aroma. Chop the cilantro stems (reserve the leaves) and add them as well, stir, add a splash of water, and cover. Sweat for about 20 minutes, adding a splash of water every so often to prevent it sticking on the bottom of the pan.

2. Add peas, stock, cilantro leaves, and bring to boil. Simmer for 10 minutes; season with pepper, then leave to cool. When at room temperature, puree in a blender.

3. Drizzle with cream to garnish.


The thick consistency of this soup makes it a good choice for pasta sauce as well. You may substitute cilantro with celery. You can also add ham (for adults) if you're more of an meat-eater. Try garnishing with some toasted chopped walnuts for that extra crunch. :)


I'm linking this post with I Heart Cooking Clubs (IHCC) for this week's theme, Veggie Variations!


17

Mini Ji Dan Gao (Egg Cakes) by my MIL


Mini Ji Dan Gao (Egg Cakes)

These mini egg cakes are just so cute and too delicious to resist! My MIL has an awesome recipe and she bakes these mini cakes in her trusted doughcake toaster (photos below). If you don't have this toaster, you can use any cake molds you like and bake in an oven. The recipe below uses standard kuih bahulu molds.

My toddler is so lucky! Everyone in the house likes to bake goodies for him to eat. Haha.

 
Ingredients:
(Makes 25 with standard kuih bahulu molds)
 

3 large eggs
100g granulated sugar (can substitute with molasses sugar)
1/4 teaspoon vanilla essence
110g all-purpose flour
1/2 teaspoon baking powder


How to:

1. Preheat oven to 210°C. Lightly grease the cake molds with vegetable oil.

2. Use an electric mixer to beat the eggs and sugar in a mixing bowl until light and fluffy. Add vanilla essence and mix gently with a spatula.

3. Sift flour and baking powder. Fold into the egg mixture gently in 3 batches until well-combined. Fold gently with a spatula after each batch.

4. Spoon batter into prepared cake molds up to two-thirds of each mold.

5. Bake for 8-10 minutes until the tops turn light golden brown. Un-mold and let cool on cooling rack before storing in an airtight container.


This doughcake toaster is as old as my husband!
That's 30++ years. ;)

I like the shapes.

You might also like this similar recipe - Banana Ji Dan Gao.

Enjoy!


4

ABC Seaweed Soup with Korean Vermicelli


ABC Seaweed Soup with Korean Vermicelli

To me, ABC soup is the mother of all soups. :) Even newbie home-cooks can master cooking this soup. The original ABC soup contains three basic ingredients: carrot, onion, potato. I like to add in other vegetables and meat. So, here's my latest variation of ABC Soup.

 
Ingredients:
(Serves 4)

1 large stewing pork bone
1 large carrot, chopped into chunks
1 large yellow onion, chopped into chunks
1 large potato, chopped into chunks
A handful of goji berries (wolfberries), soaked until soft and rinsed
10 small dried shiitake mushrooms, soaked until soft and rinsed
2 large sheets of dried seaweed
Salt to taste*
Enough Korean vermicelli for two adults and one toddler

* I only add in salt into the main pot after scooping aside a separate bowl for my toddler.


How to:

1. Put all ingredients (except vermicelli) into a slow cooker pot, add water to cover, close the lid, and switch on the High mode for 4 hours. Then, switch to Low mode for another 2 hours. Season with salt (refer * above) before switching off.

2. Just before serving, boil glass noodles in boiling water for about 5 minutes. Drain noddles into serving bowls and pour hot soup over it.


See the huge pork bone? I had a good time gnawing it. :)

Cooked Korean Vermicelli.


On a side note, here's another variation of my Spicy Spaghetti. I named it Chinese Fried Spicy Spaghetti. Recipe from my previous endeavor with a little twist - I added sausages and bacon crisps.

Photobucket

This post is linked to the event, Little Thumbs Up (January 2015 Event: Pasta / Noodles) organized by Zoe (Bake for Happy Kids), Doreen (My Little Favourite DIY) and hosted by Anne (My Bare Cupboard).


6

Hot Milk Cake with Cherries & Yogurt


Hot Milk Cake with Cherries & Yogurt

Hot milk cake. Mmmm. Sounds nutritious and interesting. These lovely mini cakes were made to join the latest bake-along event. Heehee.

The original theme should be hot milk cakes with strawberries and cream. But I've ONE KILO of fresh red cherries in the fridge. So I guess I'd substitute strawberries with cherries. Oh, and cream. I don't keep cream in my pantry. But I do have a tub of Greek yogurt, so I guess yogurt should do the trick.

By the way, speaking of cherries. They are sweet Tasmanian cherries. I adore them. They are best eaten chilled straight from the fridge. I assumed the little one would love them but I was so wrong. He took one bite and gave me this "what-is-this-mom-are-you-trying-to-poison-me" kind of look. Then he started playing with the stem, shaking the cherry until the fruit detached, then he tried to attach it back. HAHAHA!


Recipe adapted from here and inspired by Lian.


Ingredients:
(Makes 16 mini square cakes)

Note: My modifications in orange

Nonstick vegetable oil spray (omitted)
2 large eggs 
2/3 cup plus 1/2 cup sugar (I used 1/2 cup plus 2 tablespoons molasses sugar)
3/4 teaspoon vanilla extract, divided (I used 1/2 teaspoon)
1 cup plus 2 tablespoons self-rising flour (I used all-purpose flour with 2 teaspoons baking powder)
2/3 cup whole milk
5 tablespoons unsalted butter
1 pound large strawberries, hulled, thinly sliced lengthwise (I used fresh cherries, stoned and mashed)
1/2 cup chilled heavy whipping cream (I used Greek yogurt)
1 tablespoon powdered sugar
(omitted)

Note: The original recipe uses muffin pan or ramekins to bake individual cakes. I followed Lian's method and bake in a cake pan.


How to:

1. Preheat oven to 210°C. Line a 8x8-inch square cake pan with baking paper. Set aside.

2. Beat eggs in medium bowl with electric mixer at high speed until thick, about 3 minutes. Gradually beat in 1/2 cup sugar; beat until thick and pale yellow, about 1 minute longer. Beat in 1/2 teaspoon vanilla. Add flour and beat 30 seconds.

3. Bring milk and butter just to boil in small saucepan, stirring until butter melts. Add hot milk mixture to batter; beat until blended and smooth, about 30 seconds. Pour batter into prepared cake pan.

4. Bake until the top turn pale golden and firm to touch, about 20 minutes. Cool in pan at least 20 minutes. Let stand at room temperature.

5. Toss cherries and 2 tablespoons sugar in medium bowl to coat. Let stand 30 minutes for juices to form.

6. Remove cake from pan. Cut off sides and cut into squares. Spoon some cherries and juice over. Cover cherries with tops of cakes. Spoon Greek yogurt over, garnish with remaining cherries and juices, and serve.

The cake, nicely baked with a lovely pale golden top.

The thickness is just right.

My toddler munches on these cut-off cake sides as snack.

Cherries soaking in its own juices and sugar.

Assembled with cherries and yogurt.

Time to feast!


I'm linking this post to the event, Bake-Along #74: Theme - Hot-Milk Cakes with Strawberries and Cream organized by Joyce from Kitchen Flavours, Lena from Frozen Wings, and Zoe from Bake for Happy Kids.


8

ECOVER's All Purpose Cleaner saves my hands and feet!

The toddler's toilet needs cleaning!

I dread cleaning the house, especially the TOILET! My hands and feet are sensitive towards those commercial chemical-laden household cleaning products. The skin on my finger tips will start to itch and peel after touching those liquid. The skin on the sole of my feet will start to crack and sometimes bleed, making every step raw and painful. Urgh!!!

I always avoid using those harsh detergent, but cleaning with water isn't sufficient and I have a toddler in the house whom I've started to potty-train. He will pee in the toilet and if he poops, I'll wash his bottom in the toilet too. So, the toilet has pee and poop and stains and slimy mold and god-knows-what-else. I can't and shouldn't procrastinate cleaning the toilet!!!

Then, ECOVER arrives. I tell you, I'm so happy beyond words. Why? Because ECOVER's household cleaning products are made of natural plants and minerals which are non-toxic and free of harmful chemicals and they are the savior for people with sensitive skin!


I use ECOVER's All Purpose Cleaner to clean my toddler's toilet. The subtle lemon fragrance helps a lot in soothing my senses as I scrub the floor. If not, I'll be choking from inhaling those overpowering "fragrant" chemical vapor from commercial cleaning detergent.

One thing that surprises me is that I don't feel stinging pain at the sole of my feet. If I'm using normal detergent, I'll usually feel lingering pain even when I'm wearing slippers because the chemical-laden water is just too harsh for my poor feet. With ECOVER's all purpose cleaner, I'm surprised I don't feel lingering pain, maybe just brief discomfort.

Also, I don't like to wear gloves when I'm cleaning because they slow me down. I like scrubbing the floor with naked hands. With this cleaner, I don't experience peeling skin right after cleaning. Awesome eh?


Tada, the toilet is now sparkly clean. I'm one happy mama!


2

Breastfeeding my toddler @ 17 months

Source

Oh yes, breastfeeding a toddler is so different from breastfeeding a baby. The image above represents the practice of nursing a toddler. It's called gymnurstics. :)

Three things I learn about nursing a toddler

#1 - They can be physically demanding. They pinch, twiddle, and pull the other nipple (if that's their habit). They turn their heads and look around, without warning, unless you can sense it. They do a marathon of kneeling down, squatting, standing up, and sitting down. Sometimes, they prefer "boob-surfing" - left boob, right boob, repeat. When they are teething, they might bite. Ouch!

#2 - It's a relationship - both mom and toddler need it! It's a partnership, an engagement - for long-term benefit - which goes well beyond nutritional needs. Heard of mothering through nursing? When they get sensory overload from their surroundings or during play time and they can't handle it anymore, they will run to you (you're THE mother) for timeout.

I can testify that nursing is the best way to calm down an over-stimulated and cranky toddler. That calm-and-stoned look as my toddler latches on is what makes me continue our breastfeeding journey. Of course, he hasn't shown interest in weaning yet. I can't force him to latch on if he doesn't want to. :)

#3 - It's an instinctual maternal habit. I co-sleep with my toddler from his babyhood. I think this helps us to establish our breastfeeding journey well. (My toddler had tongue-tie when he was a baby and my supply was somewhat affected due to mastitis, cracked nipples, and numerous episodes of blocked ducts).

When he demands nursing while we're halfway shopping at malls, we will rush to a nearby nursing room to nurse him. Really, it's not about showing off. It's just an instinctual maternal habit.

The tot likes to stand to nurse while I sit.

******************************

Quiz: Test Your Breastfeeding IQ

I took this simple test to see how much I really know about breastfeeding. Guess what? I scored 100%! If your score is between 90-100, congratulations! You've done your research, and should feel comfortable with your level of breastfeeding knowledge. Yay!!!

I like these two questions the most:

The best food for a sick breastfed baby with diarrhea is... BREASTMILK! Not soda, water or Pedialyte. Yeah, my tot only wanted to latch on 24/7 when he had stomach flu.

The average age of weaning world-wide is... 2-4 years old! Not 6 months, 1 year, or 1½ years.


******************************

Diagrams of the breastfed baby and toddler

The diagrams below (from TheAlphaParent) are excellent bite-sized sources describing the well-being of a breastfed baby AND when the baby has grown into a huge baby (toddler).

For bigger image, click here.

For bigger image, click here.

I'm doing my very best to let him latch on as much and as long as he likes so that he gets the necessary immunity factors he needs from breastmilk. Some breastmilk is better than none.


******************************

The power of breastmilk

Some of the immune factors in breastmilk increase in concentration during the second year and also during the weaning process.
[Source]


In the second year (12-23 months), 448ml of breastmilk provides:

    29% of energy requirements
    43% of protein requirements
    36% of calcium requirements
    75% of vitamin A requirements
    76% of folate requirements
    94% of vitamin B12 requirements
    60% of vitamin C requirements


Breastfeeding is a warm and loving way to meet the needs of toddlers and young children. It not only perks them up and energizes them; it also soothes the frustrations, bumps and bruises, and daily stresses of early childhood. In addition, nursing past infancy helps little ones make a gradual transition to childhood.
[Source]


The American Academy of Pediatrics recommends that: Breastfeeding should be continued for at least the first year of life and beyond for as long as mutually desired by mother and child. Increased duration of breastfeeding confers significant health and developmental benefits for the child and the mother. There is no upper limit to the duration of breastfeeding and no evidence of psychological or developmental harm from breastfeeding into the third year of life or longer.
[Source]


******************************

Links

More awesome informative links about breastfeeding toddlers on kellymom.com and themilkmeg.com - THANKS!

Napping after a satisfying nursing session. :)

0

Butterscotch Chips Pancakes


Butterscotch Chips Pancakes

I love pancakes. Easy, versatile, delicious, pretty. Most importantly, my toddler can shove a few of these down his throat while I watch in awe! :D

If I'm running out of time, I'll use pancake premix such as Pillsbury original pancake mix. If not, I'll be using my favorite homemade pancake mix recipe. Here you go!

 
Ingredients:
(Makes 20-24 if you scoop the batter with the measuring spoon set's tablespoon)


1 & 1/2 cup all-purpose flour
1 teaspoon baking powder
1 tablespoon sugar (reduced to 1/2 tablespoon because butterscotch chips are sweet)
3/4 cup fresh milk

1/4 cup water
2 tablespoons rice bran oil
1/4 cup butterscotch chips


How to:

1. Combine flour, baking powder, and sugar in a bowl. Make a well in the center. Combine milk, oil, and water in a jug. Add to flour mixture. Whisk until smooth. Stand for 10 minutes. After 10 minutes, stir in butterscotch chips.

2. Heat up a frying pan and lightly grease with vegetable oil.

3. Scoop one tablespoon of batter by using the measuring spoon set's tablespoon onto the hot frying pan.

4. Cook until bubbles appear on the surface. Flip with a spatula, and cook until browned on the other side. Repeat with remaining batter to make 20-24 pancakes.


5. Sprinkle more butterscotch chips and drizzle with maple syrup before serving.


They are so pretty!

I'm in pancake heaven!


2

Pasta e Fagioli (Pasta & Beans Soup) with Beef & Vegetables


Pasta e Fagioli (Pasta & Beans Soup) with Beef & Vegetables

Pasta e Fagioli. The name sounds posh. I google it up and learn that pasta e fagioli means pasta and beans soup.
I always love this sort of one-pot pasta soups and stews. They are the epitome of comfort food.

I've cooked these before: Double Cheese Pasta Stew and Chicken & Vegetables Cheesy Pasta Stew.

Over here at I Heart Cooking Clubs, it's Pot Luck week and we can choose to cook anything from these chefs: Diana Henry, Nigella Lawson, Mark Bittman, Giada de Laurentiis, Jamie Oliver, Tessa Kiros, Rick Bayless, Madjur Jaffrey, Yotam Ottolenghi, Donna Hay, and Nigel Slater.

Last month's pot luck, I cooked Giada's Hearty Meatball Stew for Christmas eve dinner. It was good! This month, I cook Giada's Pasta e Fagioli. I really love her family-oriented Italian dishes. Most importantly, my 17-month toddler loves pasta dishes!


Recipe adapted from here. 

Ingredients:
(Serves 6)

Note: My modifications in orange.

4 sprigs fresh thyme
1 large sprig fresh rosemary
1 bay leaf
1 tablespoon olive oil
1 tablespoon butter
1 cup chopped onion
3 ounces pancetta, chopped (I used beef slices)
2 teaspoons minced garlic
5 3/4 cups low-sodium chicken broth (I used beef broth)
2 (14.5-ounce) cans red kidney beans, drained and rinsed (I used cannellini beans)

3 cups mixed chopped vegetables (potato, carrot, red & green bell pepper, celery, leek, shiitake mushrooms)
3/4 cup elbow macaroni (I used small shell pasta & animal-shaped pasta)
Freshly ground black pepper
Pinch red pepper flakes, optional (omitted)
1/3 cup freshly grated Parmesan (omitted)
1 tablespoon extra-virgin olive oil


How to: 

1. Wrap the thyme, rosemary, and bay leaf in a piece of cheesecloth and secure closed with kitchen twine.

2. Heat 1 tablespoon olive oil and butter in a heavy large saucepan over medium heat. Add onion, garlic, and beef and saute until the onion is tender, about 3 minutes.

Note: I used a slow cooker and here's what I did. After stir-frying over the stove, I transferred the beef, onion, and garlic into a slow cooker and add broth, beans, vegetables, and sachet of herbs. Then I covered the slow cooker and switched on High mode for two hours until the vegetables became very tender. The herbs sachet was discarded at this point. Cooking resumed for another 1.5 hours.

3. Add pasta and simmer for another 30-45 minutes. Season the soup with ground black pepper.

4. Ladle the soup into bowls and drizzle with extra-virgin olive oil just before serving.

All the healthy ingredients in one pot.

These are the small vegetable shell pasta I used.

I love their colors!

Adding the pasta.

Adding the animal-shaped pasta.


I'm linking this post with I Heart Cooking Clubs (IHCC) for this week's theme, January Pot Luck!


Photobucket

This post is linked to the event, Little Thumbs Up (January 2015 Event: Pasta / Noodles) organized by Zoe (Bake for Happy Kids), Doreen (My Little Favourite DIY) and hosted by Anne (My Bare Cupboard).


20

Chocolate Marshmallows Cookies (with a little story... again) :)


Chocolate Marshmallows Cookies

I made my first batch of cookies! And it wasn't part of my baking plan. LOL.

If you've read my spaghetti "fiasco" in the kitchen, here's another story to read. :P

My hubby came back from work one evening and told me he accidentally bought me something. I was like, "Wow, I wonder what."

He showed me a box of cookie mix...

...and with a funny grin on his face, he told me sheepishly, "I thought I was buying cookies."

HAHAHAHAHAHAHA! I have the cutest hubby on earth.

Hot Cocoa Cookie Mix

Easy to bake!

Ingredients:
(Makes 20)

1 box cookie mix
5 tablespoons butter, room temperature
3 tablespoons water
2 tablespoons chocolate chips (optional)


How to:

1. Preheat oven to 170°C. Linea baking tray with baking sheet.

2. Combine ingredients in a mixing bowl and mix until well blended.

3. Form into 20 balls and place 2 inches apart on prepared baking sheet.

4. Bake for 10-12 minutes.

5. Cool on baking sheet for 1 minute and transfer to rack to cool completely.


The balls.

Done after 12 minutes.

Cooling on the rack.

My upcoming plan is to bake cookies from scratch! See these lovely chips that I just bought from Bake with Yen! Can't wait!


I'm over the moon!


6

Baked Peach with Honey & Star Anise


Baked Peach with Honey & Star Anise

I have some leftover canned peach from making mille-feuille. So I use up the rest to make this simple dessert to join IHCC's Along the Spice Trail.

The original recipe is called apricots roasted with cardamom, honey, and orange. I substitute apricots with peach and cardamom with star anise. I still use honey and orange.


Ingredients:
(Serves 2)

5 canned peach halves, drained and rinsed
2 star anise
2 tablespoons runny honey
Juice from 1 orange
2 tablespoons molasses sugar (or dark muscovado sugar)

A handful of chopped toasted walnuts


How to: 

1. Preheat oven to 180°C.

2. Arrange the peach halves in a baking tray in a single layer, cut sides up. Drizzle over the honey, pour the orange juice around the fruits, then sprinkle over the sugar. Toss the star anise into the tray.

3. Bake for about 30 minutes. Serve warm with chopped walnuts.


Before baking.

After baking.

I like the aroma of the star anise-infused peach halves. The crunch from the walnuts complements the softness of the peaches very well. The fragrance of honey complements the warmth of star anise. Such a heartwarming dessert!


I'm linking this post with I Heart Cooking Clubs (IHCC) for this week's theme, Along the Spice Trail.


10